1
2
3
4
5
6
7
8
9
10
11
12
13
14
15
16
17
18
19
20
21
22
23
24
25
26
27
28
29
30
31
32
33
34
35
36
37
38
39
40
41
42
43
44
45
46
47
48
49
50
51
52
53
54
55
56
57
58
59
60
61
62
63
64
65
66
67
68
69
70
71
72
73
74
75
76
77
78
79
80
81
82
83
84
85
86
87
88
89
90
91
92
93
94
95
96
97
98
99
100
101
102
103
104
105
106
107
108
109
110
111
112
113
114
115
116
117
118
119
120
121
122
123
124
125
126
127
128
129
130
131
132
133
134
135
136
137
138
139
140
141
142
143
144
145
146
147
148
149
150
151
152
153
154
155
156
157
158
159
160
161
162
163
164
165
166
167
168
169
170
171
172
173
174
175
176
177
178
179
180
181
182
183
184
185
186
187
188
189
190
191
192
193
194
195
196
197
198
199
200
201
202
203
204
205
206
207
208
209
210
211
212
213
214
215
216
217
218
219
220
221
222
223
224
225
226
227
228
229
230
231
232
233
234
235
236
237
|
# Tuya.Net
.NET Standard 2.0 library to interface with Tuya WiFi smart devices over LAN, without using the cloud.
## Description
This library controls and monitors [Tuya](https://en.tuya.com/) compatible WiFi Smart Devices (Plugs, Switches, Lights, Window Covers, etc.) using the local area network (LAN). [Tuya](https://en.tuya.com/) devices are designed to communicate with the TuyaCloud but most also expose a local area network API, allowing us to directly control the devices without using the cloud.
## Installation
You can use NuGet:
```
PM> Install-Package TuyaNet
```
### Dependencies
* .NETStandard 2.0
* Newtonsoft.Json (>= 13.0.1)
## How communication with Tuya devices works at all
Every Tuya device broadcasts to local network UDP packets with short info about itself. This data is encrypted with AES but the encryption key is the same for every device and it can be easily decrypted. This packet is sent every 5 seconds and contains data with a unique **device ID**, device type ID and protocol version.
Also, every device can accept TCP connection and proceed requests. Every request contains command code and JSON string. JSON string is encrypted with AES using **local key**. This key is assigned by the Tuya cloud server and is unique for each device. So you need to create a Tuya developer account and request this key from the server.
Most requests must contain base JSON values:
```JSON
{
"gwId": "DEVICE_ID",
"devId": "DEVICE_ID",
"uid": "DEVICE_ID",
"t": "CURRENT_TIME"
}
```
Where `DEVICE_ID` is a **device ID** and `CURRENT_TIME` is a Unix timestamp as a string.
Every response contains command code, JSON and return code (0 = success).
Most devices are controlled via data points (DPs). Every data point has a number and a value. Usually you can send `DP_QUERY` (0x0A) command and receive ra esponse like
```JSON
{
"devId": "DEVICE_ID",
"dps":{
"1": true,
"2": false,
"9": 0,
"10": 0
}
}
```
`dps` is a dictionary with data points and current values. This is the response from the "2 in 1" smart switch. `1` is a state of switch #1, `2` is a state of switch #2, `9` and `10` are timer values. Please note that DPs numbers are strings. DPs values can be of any type.
Usually you can change DPs values using `CONTROL` (0x07) command and JSON like:
```JSON
{
"gwId": "DEVICE_ID",
"devId": "DEVICE_ID",
"uid": "DEVICE_ID",
"t": "CURRENT_TIME",
"dps":{
"1": false
}
}
```
This request will turn off switch #1.
Don't worry, this library will help you to create requests automatically.
## How to obtain local key
* Download Smart Life mobile app: [for Android](https://play.google.com/store/apps/details?id=com.tuya.smartlife) or [for iOS](https://apps.apple.com/us/app/smart-life-smart-living/id1115101477)).
* Register your device using this app.
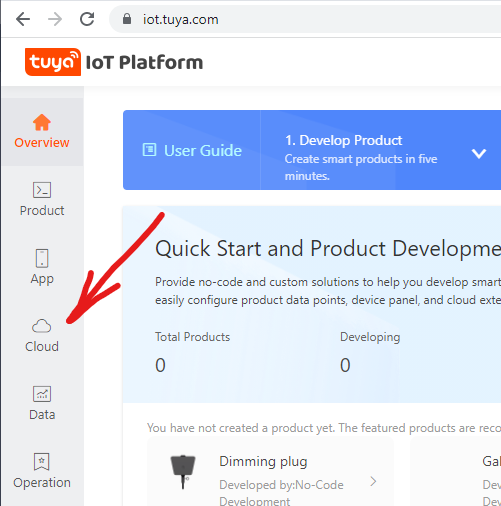
* Open [iot.tuya.com](https://iot.tuya.com/), create developer account and log in.
* Click on `Cloud`
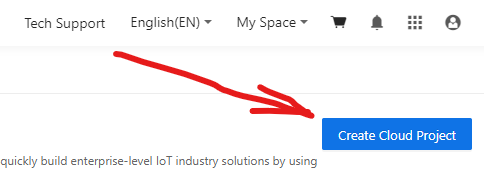
* Click on `the Create Clout Project` button
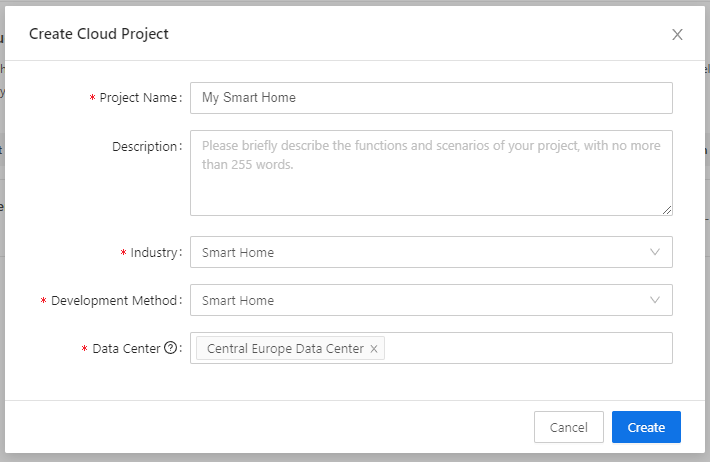
* Enter any name for your project, select "Smart Home" for industry and development method. You can select any data center but you **must** remember which one you chose.
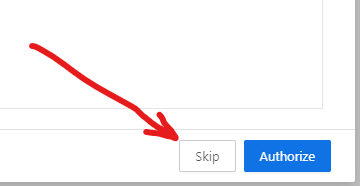
* Skip Configuration Wizard.
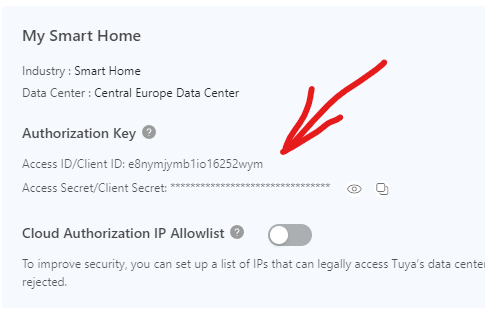
* Copy and save your **Access ID** and **Access Secret**.
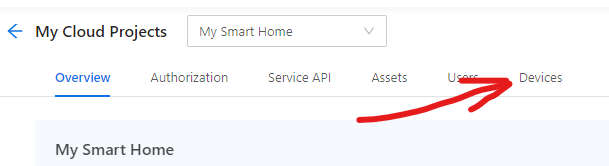
* Select `Devices`.
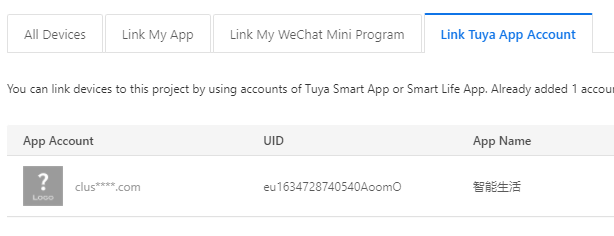
* Select `Liny Tuya App Account`.
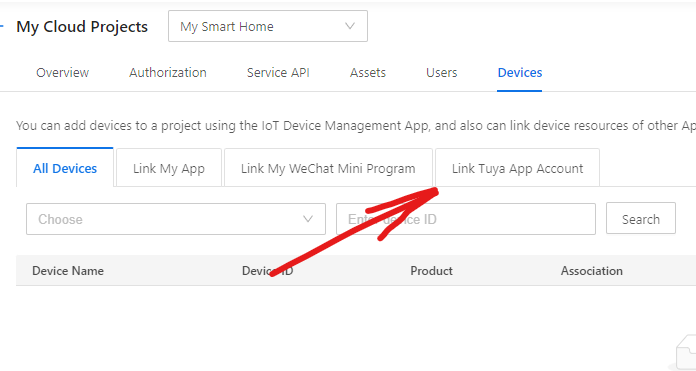
* Click on `Add App Account` and it will display a QR code.
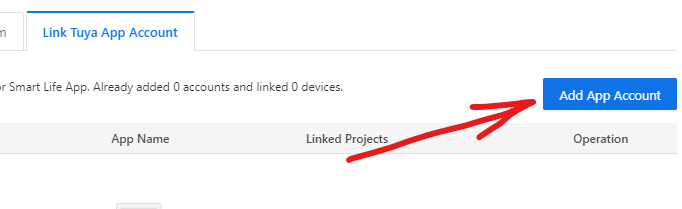
* Scan the QR code using your mobile phone and Smart Life app by going to the "Me" tab and clicking on the QR code button [..] in the upper right hand corner of the app. Your account should appear on the list.
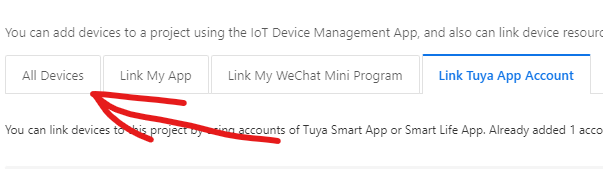
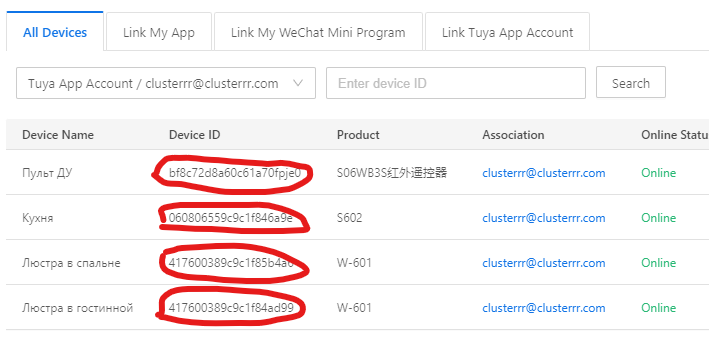
* Now open the `Devices` tab.
* You should see list of your devices. Copy and save at least one device ID.
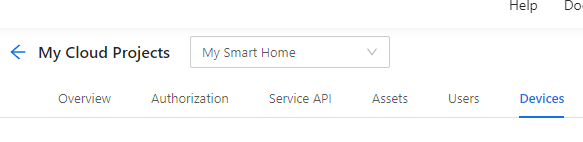
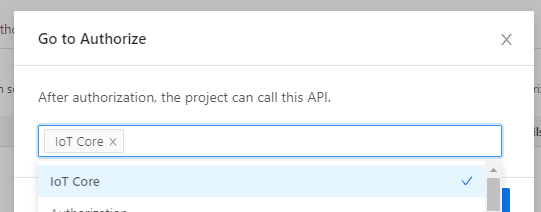
* Click on the `Service API` tab.
* Click on `Go to Authorize`

* Add `IoT Core` API (subscribe to it first).
* Now you can retrieve **local keys** of your devices using `TuyaApi` class:
```C#
var api = new TuyaApi(region: TuyaApi.Region.CentralEurope, accessId: ACCESS_ID, apiSecret: API_SECRET);
var devices = await api.GetAllDevicesInfoAsync(anyDeviceId: DEVICE_ID);
foreach(var device in devices)
{
Console.WriteLine($"Device: {device.Name}, device ID: {device.Id}, local key: {device.LocalKey}");
}
```
`region` - the region of the data center that you have selected on [iot.tuya.com](https://iot.tuya.com/)
`accessID` and `apiSecret` - `Access ID` and `Access Secret` from [iot.tuya.com](https://iot.tuya.com/)
`anyDeviceId` - ID of any of your smart devices (to fetch user ID).
## Network scanner for Tuya devices
You can use `TuyaScanner` class to catch and decode broadcast UDP packets from devices:
```C#
static void Main(string[] args)
{
var scanner = new TuyaScanner();
scanner.OnNewDeviceInfoReceived += Scanner_OnNewDeviceInfoReceived;
Console.WriteLine("Scanning local network for Tuya devices, press any key to stop.");
scanner.Start();
Console.ReadKey();
scanner.Stop();
}
private static void Scanner_OnNewDeviceInfoReceived(object sender, TuyaDeviceScanInfo e)
{
Console.WriteLine($"New device found! IP: {e.IP}, ID: {e.GwId}, version: {e.Version}");
}
```
You can use it to retrieve the device's **IP address**, **ID**, and **protocol version**. Remember that your computer must be on the same network as your devices to receive broadcasts.
## How to communicate with devices
You should now have:
* Device IP address - from scanner or from your router
* Device local encryption key - retrieved via `TuyaApi`
* Device ID - from scanner or from [iot.tuya.com](https://iot.tuya.com/)
There is `TuyaDevice` class, you need create instance of it:
```C#
var dev = new TuyaDevice(ip: DEVICE_IP, localKey: DEVICE_KEY, deviceId: DEVICE_ID);
```
It uses protocol version 3.3 by default but you can specify version 3.1 as well:
```C#
TuyaDevice dev = new TuyaDevice(ip: DEVICE_IP, localKey: DEVICE_KEY, deviceId: DEVICE_ID, protocolVersion: TuyaProtocolVersion.V31);
```
Now you can encode requests:
```C#
byte[] request = device.EncodeRequest(TuyaCommand.DP_QUERY, "{\"gwId\":\"DEVICE_ID\",\"devId\":\"DEVICE_ID\",\"uid\":\"DEVICE_ID\",\"t\":\"CURRENT_TIME\"}");
```
Send it:
```C#
byte[] encryptedResponse = await device.SendAsync(request);
```
And decode response:
```C#
TuyaLocalResponse response = device.DecodeResponse(encryptedResponse);
Console.WriteLine($"Response JSON: {response.JSON}");
```
How to set DPs:
```C#
byte[] request = device.EncodeRequest(TuyaCommand.CONTROL, "{\"gwId\":\"DEVICE_ID\",\"devId\":\"DEVICE_ID\",\"uid\":\"DEVICE_ID\",\"t\":\"CURRENT_TIME\"},\"dps\":{\"1\":false}}");
byte[] encryptedResponse = await device.SendAsync(request);
TuyaLocalResponse response = device.DecodeResponse(encryptedResponse);
Console.WriteLine($"Response JSON: {response.JSON}");
```
Too complicated, isn't it? There is more simple way. You can use `FillJson()` method to fill standard fields automatically:
```C#
byte[] request = device.EncodeRequest(TuyaCommand.CONTROL, device.FillJson("{\"dps\":{\"1\":false}}"));
byte[] encryptedResponse = await device.SendAsync(request);
TuyaLocalResponse response = device.DecodeResponse(encryptedResponse);
Console.WriteLine($"Response JSON: {response.JSON}");
```
Also, there is `SendAsync()` overload that accepts command ID with JSON, encodes it, and returns decoded data:
```C#
TuyaLocalResponse response = await device.SendAsync(TuyaCommand.CONTROL, device.FillJson("{\"dps\":{\"1\":false}}"));
```
Finally, there are `GetDps()` and `SetDps()` methods:
```C#
Dictionary<int, object> dps = await device.GetDps();
// Change multiple values at once
Dictionary<int, object> newDps = await device.SetDps(new Dictionary<int, object> { { 1, false }, { 2, true } });
// Change single value
newDps = await device.SetDps(1, true);
```
## Credits
* TinyTuya https://github.com/jasonacox/tinytuya by Jason Cox
For Python version of the library inspired me
* Tuya Smart Plug API https://github.com/Marcus-L/m4rcus.TuyaCore by Marcus Lum
For some ideas and algorithms
* TuyAPI https://github.com/codetheweb/tuyapi by codetheweb and blackrozes
For protocol reverse engineering, additional protocol reverse engineering from jepsonrob and clach04
## Contacts
* My site (Russian): https://clusterrr.com
* Email and PayPal: clusterrr@clusterr.com
* Telegram: https://t.me/Cluster_M
|
