
diff options
| author | Dmitry V. Sokolov <ssloy@users.noreply.github.com> | 2020-02-19 01:17:45 +0300 |
|---|---|---|
| committer | GitHub <noreply@github.com> | 2020-02-19 01:17:45 +0300 |
| commit | a3c8ca304809f15d166dac1a8b7cfa879d492496 (patch) | |
| tree | 4c3cb3de0233f9e750e59280d55ae2d21baa9c5e | |
| parent | 5b955c72811ae047f87df38a1e8966a071b21859 (diff) | |
Update README.md
| -rw-r--r-- | README.md | 25 |
1 files changed, 14 insertions, 11 deletions
@@ -19,6 +19,18 @@ Penny is a tremendous fun! Penny has two elder sisters, [Penny](https://youtu.be/7Py03SH5DbE) and [Penny](https://youtu.be/PiVTC8JhZTQ). Note that I have no hardware contributions, all I did is to gather the information, assemble things and write the firmware. I want this wonderful robot to be easy to clone, therefore I created this repository. The original Penny#1 is created by [Jeremy Zimmer](https://www.robotshop.com/community/robots/show/penny). The wiring being cumbersome and cheapduino being discontinued, Dennis van Elteren has designed the motherboard that I also use. Thus Penny#2 was born. Here I present you Penny#3. While I have Dennis' sanction to publish his files, I failed to contact Jeremy. The software, however is distributed under the DO WHAT THE FUCK YOU WANT TO PUBLIC LICENSE. # How to clone +## Bill of materials +Printing the body costs next to nothing if you have a 3d printer. Here are the main things you need to build the bot: +* The motherboard. You can either etch it by yourself, or you can check chinese factories, any normal day it costs ~10€ / 10 pcs (shipping included), with discounts it can cost 2€ / 10 pcs. You can find an alternative like cheapduino or similar, because the schematics is very, very basic. +* [SG90 9G micro servo, 3 * 1.47€ / piece](https://www.aliexpress.com/item/4000595327297.html) +* [4x AAA battery holder, 1.34€ / piece](https://www.aliexpress.com/item/33049875634.html) +* [ATMega8A-AU (QFP-32), 1€ / piece](https://www.aliexpress.com/item/32557093316.html) +* [IR LED + IR phototransistor, 0.20€ / pair](https://www.aliexpress.com/item/32849824664.html) +* [Electrolytic capacitor 1000uF 16V, 0.17€ / piece](https://www.aliexpress.com/item/32954075821.html) +* [2n3904 transistor, 3 * 0.01€ / piece](https://www.aliexpress.com/item/32494899564.html) +* You will need wires, heat shrink, screws, pin headers, few 0805 resistors and capacitors. All electronic components are listed in the [hardware/motherboard/BOM.html](https://github.com/ssloy/penny/blob/master/hardware/motherboard/BOM.html) file. + + ## The body It is quite straightforward, if you have a printer, just print it. You can find the files in the [hardware/body/](https://github.com/ssloy/penny/tree/master/hardware/body) folder. All the body parts are shown here: @@ -37,17 +49,6 @@ I recommend soldering the bare minimum to power up the processor, and to flash i 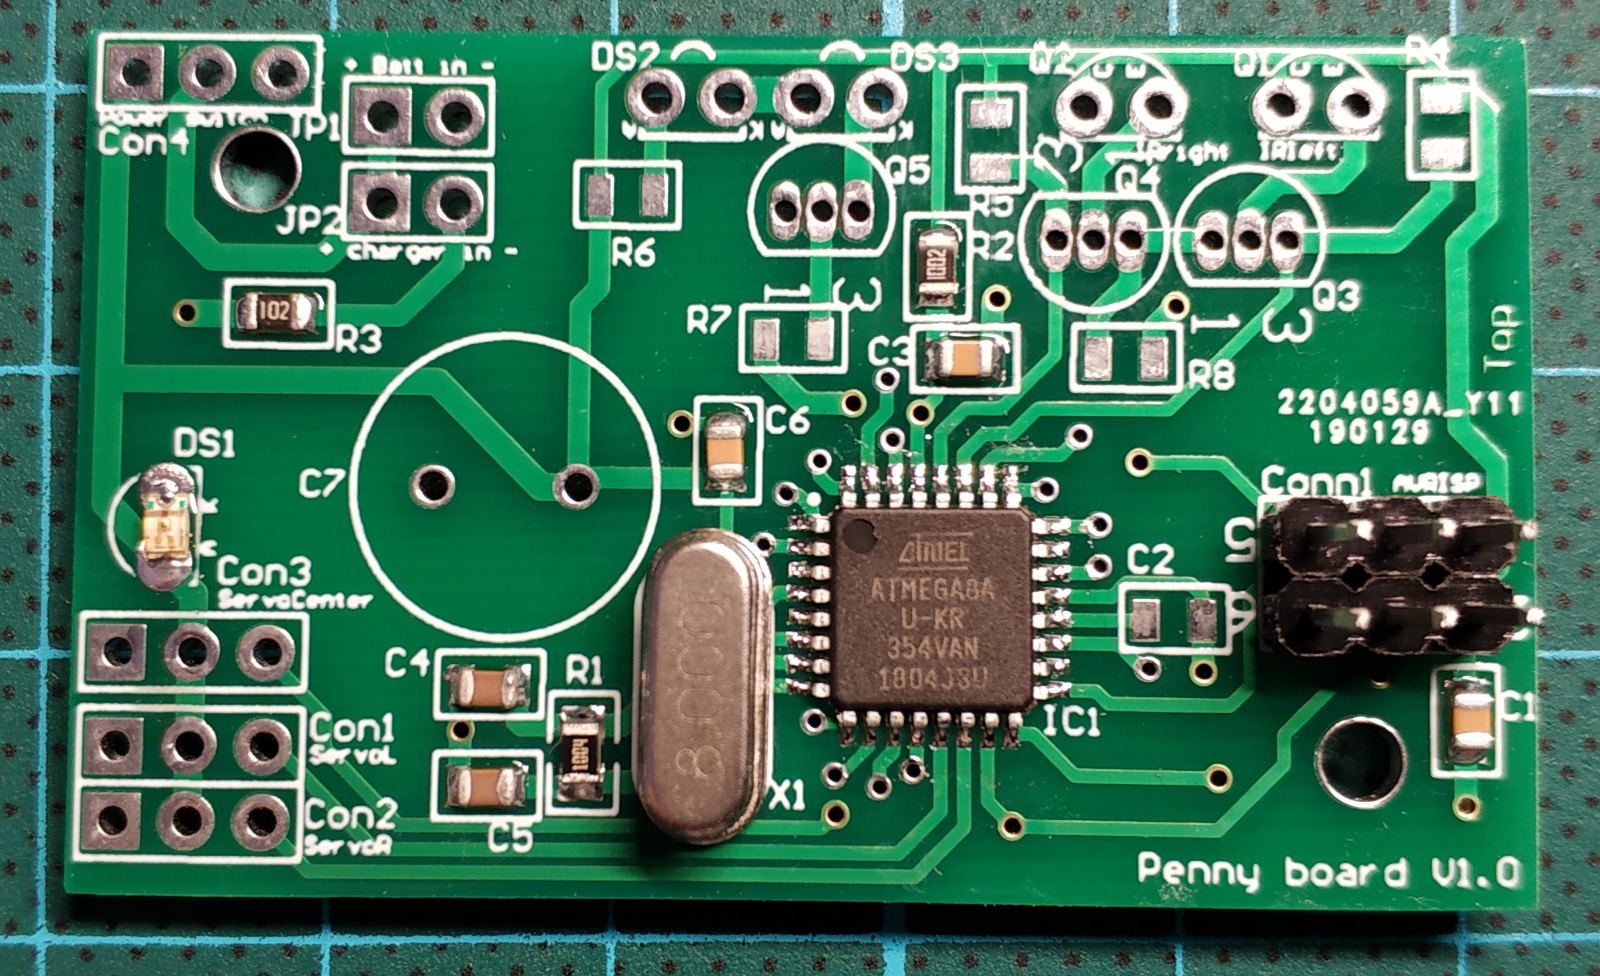 -### Bill of materials -Printing the body costs next to nothing if you have a 3d printer. Here are the main things you need to build the bot: -* The motherboard. You can either etch it by yourself, or you can check chinese factories, any normal day it costs ~10€ / 10 pcs (shipping included), with discounts it can cost 2€ / 10 pcs. -* [SG90 9G micro servo, 3 * 1.47€ / piece](https://www.aliexpress.com/item/4000595327297.html) -* [4x AAA battery holder, 1.34€ / piece](https://www.aliexpress.com/item/33049875634.html) -* [ATMega8A-AU (QFP-32), 1€ / piece](https://www.aliexpress.com/item/32557093316.html) -* [IR LED + IR phototransistor, 0.20€ / pair](https://www.aliexpress.com/item/32849824664.html) -* [Electrolytic capacitor 1000uF 16V, 0.17€ / piece](https://www.aliexpress.com/item/32954075821.html) -* [2n3904 transistor, 3 * 0.01€ / piece](https://www.aliexpress.com/item/32494899564.html) -* You will need wires, heat shrink, screws, pin headers, few 0805 resistors and capacitors. - ### The proximity sensor 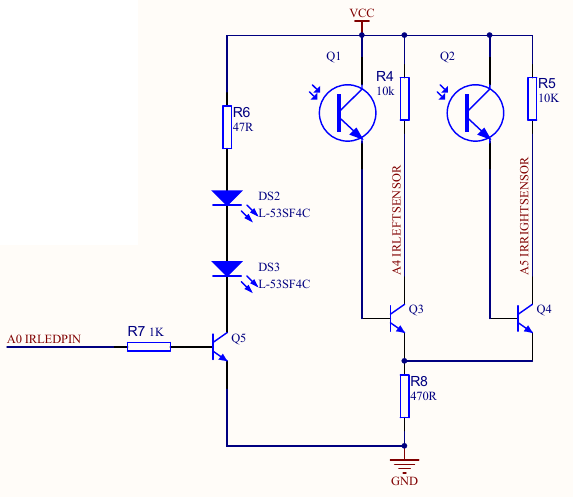 @@ -65,3 +66,5 @@ If you are a good soul willing to create a V2 of the motherboard, you are very w * Add test pads easy to access with an oscilloscope; * Add a couple of debug LEDs; * Create good soldering points for unused ATMega8 pins for debugging and further extension. + +I guess that it would be a good idea to port the code to arduino environment for those who do not want to call avr-gcc directly. If you can do it, send me a pull request. |