
diff options
| author | Dmitry V. Sokolov <ssloy@users.noreply.github.com> | 2020-02-21 01:15:52 +0300 |
|---|---|---|
| committer | GitHub <noreply@github.com> | 2020-02-21 01:15:52 +0300 |
| commit | dad40306262c444976b0c3769992ba6cd59b9888 (patch) | |
| tree | 4fa2be850d1e33db22ec5048405ed98e39dfba27 | |
| parent | 80042ec96c998fc88868ec29b8602307d67fe5f1 (diff) | |
Update README.md
| -rw-r--r-- | README.md | 6 |
1 files changed, 6 insertions, 0 deletions
@@ -95,6 +95,12 @@ Once the sensing unit is okay, try to find a good resistor value for the LEDs to Note that it is important to put a heatshrink around both the LEDs and the phototransistors to cut off parasitic lights. Moreover, with heatshrink it fits neatly into the eyesockets. When soldering the 2n3904, I recommend to solder first the center pin, and only then the side pins, otherwise it is too easy to create hard-to-remove solder bridges. Personally I find these little basterds harder to solder than the microcontroller itself (but I am bad at soldering!). +If you do to not have an oscilloscope, that is okay, you can do it with a couple of debugging LEDs, check the blue LEDs on the following video: + +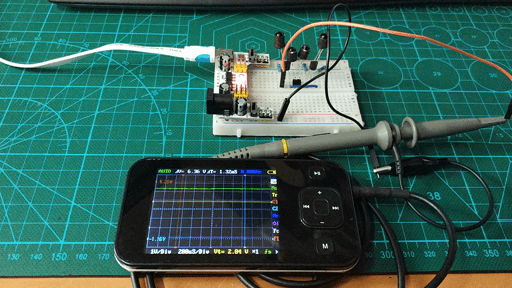 + +For a more distant obstacles the LEDs will be less bright. + If you fail to assemble the proximity sensor, or simply dislike it, there are plenty of options: * You can use isf471 instead of the phototransistors and all the 2n3904 circuitry. |