1
2
3
4
5
6
7
8
9
10
11
12
13
14
15
16
17
18
19
20
21
22
23
24
25
26
27
28
29
30
31
32
33
34
35
36
37
38
39
40
41
42
43
44
45
46
47
48
49
50
51
52
53
54
55
56
57
58
59
60
61
62
63
64
65
66
67
68
69
70
71
72
73
74
75
76
77
78
79
80
81
82
83
84
85
86
87
88
89
90
91
92
93
94
95
96
97
98
99
100
101
102
103
104
105
106
107
108
109
110
111
112
113
114
115
116
117
118
119
120
121
122
123
124
125
126
127
128
129
130
131
132
133
134
135
136
137
138
139
140
141
142
143
144
145
146
147
148
149
150
151
152
153
154
155
156
157
158
159
160
161
162
163
164
165
166
167
168
169
170
171
172
173
174
175
176
177
178
179
180
181
182
183
184
185
186
187
188
189
190
191
192
193
194
195
196
197
198
199
200
201
202
203
204
205
206
207
208
209
210
211
212
213
214
215
216
217
218
219
220
221
222
223
224
225
226
227
228
229
230
231
232
233
234
235
236
237
238
239
240
241
242
243
244
245
246
247
248
249
250
251
252
253
254
255
256
257
258
259
260
261
262
263
264
265
266
267
268
269
270
271
272
273
274
275
276
277
278
279
280
281
282
283
284
285
286
287
288
289
290
291
292
293
294
295
296
297
298
299
300
301
302
303
304
305
306
307
308
309
310
311
312
313
314
315
316
317
318
319
320
321
322
323
324
325
326
327
328
329
330
331
332
333
334
335
336
337
338
339
340
341
342
343
344
345
346
347
348
349
350
351
352
353
354
355
356
357
358
359
360
361
362
363
364
365
366
367
368
369
370
371
372
373
374
375
376
377
378
379
380
381
382
383
384
385
386
387
388
389
390
391
392
393
394
395
396
397
398
399
400
401
402
403
404
405
406
407
408
409
410
411
412
413
414
415
416
417
418
419
420
421
422
423
424
425
426
427
428
429
430
431
432
433
434
435
436
437
438
439
440
441
442
443
444
445
446
447
448
449
450
451
452
453
454
455
456
457
458
459
460
461
462
463
464
465
466
467
468
469
470
471
472
473
474
475
476
477
478
479
480
481
482
483
484
485
486
487
488
489
490
491
492
493
494
495
496
497
498
499
500
501
502
503
504
505
506
507
|
# Notrack
An original, minimal theme with a focus on self-sufficiency and
decentralization. By default, Notrack does not rely on any third parties
to serve your website. The only exception is Disqus comments, which are
not used by default (see [Adding
comments](#user-content-adding-comments) below).
# Table of contents
* [Notrack](#user-content-notrack)
* [Table of contents](#user-content-table-of-contents)
* [Screenshot](#user-content-screenshot)
* [Example site `config`](#user-content-example-site-config)
* [Shortcodes](#user-content-shortcodes)
* [User CSS](#user-content-user-css)
* [Navigation bar](#user-content-navigation-bar)
* [How to add a page to the navigation bar](#user-content-how-to-add-a-page-to-the-navigation-bar)
* [How to add a page to drop down menu](#user-content-how-to-add-a-page-to-drop-down-menu)
* [How tos](#user-content-how-tos)
* [How to create a home page](#user-content-how-to-create-a-home-page)
* [How to create a blog](#user-content-how-to-create-a-blog)
* [Adding comments](#user-content-adding-comments)
* [How to create a gallery](#user-content-how-to-create-a-gallery)
* [How to create a resume](#user-content-how-to-create-a-resume)
* [How to display social links](#user-content-how-to-display-social-links)
* [Other projects used in this theme](#user-content-other-projects-used-in-this-theme)
* [Contribution](#user-content-contribution)
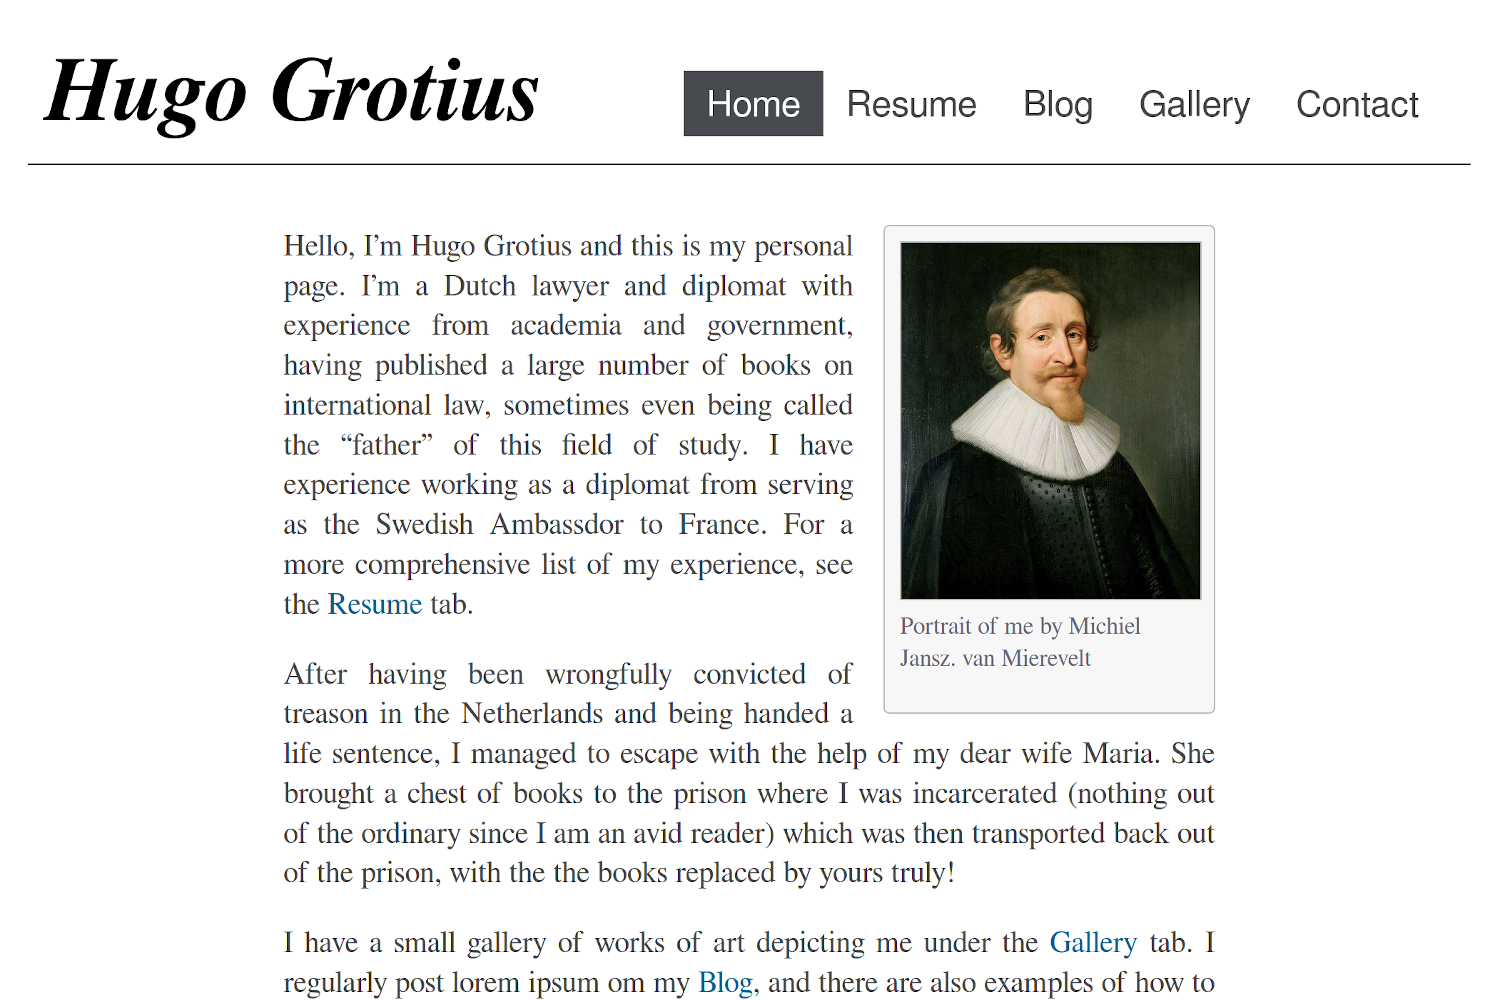
# Screenshot
# Example site `config`
Here is a working `config.yaml`:
```yaml
baseURL = "http://example.org/"
languageCode = "en-us"
title = "Lawyer Hugo Grotius"
theme = "notrack"
newContentEditor = "nvim"
mainSections = ["blog"]
# disqusShortname = "example"
paginate = 4
[params]
author = "Hugo de Groot"
siteHeading = "Hugo Grotius" # defaults to author
favicon = "hugo_grotius.png" # Adds a small icon next to the page title in a tab
showBlogLatest = true
mainSections = ["blog"]
showTaxonomyLinks = false
nBlogLatest = 4 # number of blog post om the home page
blogLatestHeading = "My writing"
footer = "This work is licensed under a Creative Commons Attribution-ShareAlike 4.0 International License."
[params.social]
github = "example"
linkedin = "example"
email = "example@example.com"
mastodon = "example"
medium = "example"
keybase = "example"
[taxonomies]
year = "year"
month = "month"
tags = "tags"
categories = "categories"
[permalinks]
blog = "/blog/:year/:month/:slug"
```
# Shortcodes
| Category | Shortcode | Description |
| :--- | :--- | :--- |
| **Contact info** | contact-box | Displays contact info set in params.social |
| | social | Displays contact info set in params.social |
| **Photo Gallery** | gallery-category | Container for gallery-photo shortcodes |
| | gallery-modal | HTML to allow for full page view of gallery photos |
| | gallery-photo | Include a photo in a gallery |
| | gallery-script | Script to allow for full page view of gallery photos |
| **General** | image | Image for use in any page. See example in [How to create a blog](#user-content-how-to-create-a-blog) |
| | video | Similar to an ordinary <video> html tag but with a CSS class to make it look good in posts |
| | rawhtml | For including raw html without the global unsafe option for Goldmark |
| **Resume** | container | Container for resume shortcodes |
| | resume-entry | One entry in a resume (e.g. a university degree) |
| | resume-section | One section in resume (e.g. "Education") |
| | resume-subcategory | Creates a heading within a section of the resume |
Most of the shortcodes are explained in more detail in their respective
sections below. I explain the other two here.
`rawhtml` can be used like this:
```go
{{< rawhtml >}}<p>A paragraph</p>{{< /rawhtml >}}
```
This allows you to use html to create elements that you can't create
with just markdown without allowing unsafe html in the site `config`.
I'm not a security expert, and there might be a good reason why unsafe HTML
is disabled by default. If you think this shortcode shouldn't be part of
the theme, feel free to open an issue and say why.
The `video` shortcode basically just creates a HTML `<video>` tag with a
class that I've added some styling for. Use it like this:
```go
{{< video src="your_video.mp4" type="video/mp4" preload="auto" >}}
```
Your video needs to be in the `static` folder or a subfolder of it such
as "video" (in which case you'd add the subfolder in the `src`
parameter.
## User CSS
You can add your own CSS by creating a file `assets/css/userstyles.css`. The
theme will automatically pick it up.
## Navigation bar
### How to add a page to the navigation bar
Add it to `main` menu in the front matter of the page:
```yaml
---
menu:
main:
title: "Contact"
weight: 100
---
```
Don't use the site `config` to add menus because then the highlighting
of active tabs might not work (at least not if drop-down menus are involved).
### How to add a page to drop down menu
Quick instruction: Set it's `parent` parameter to one of the menus in
`main`.
Instructions with example:
1. Create the top-level menu in config.yaml or your equivalent. An
example where the top-level menu doesn't correspond to a real page
(url is #) and is just there to hold the drop-down menu:
```yaml
menu:
main:
- identifier: "about-me"
name: "About Me"
url: "#"
weight: 50
```
If you want to add pages to an already existing menu item, you can skip this
step and just use that page as a parent in step 2.
2. In the front matter of the page you want to add, put the following:
```yaml
menu:
main:
title: <What you want the name of the menu to be>
parent: "about-me"
weight: <Lower numbers will appear higher up>
```
# How tos
## How to create a home page
The first thing you will want to do is set up the home page of the website.
Create `/content/_index.md` (`hugo new _index.md`). This could contain a short
introduction of what is on the website or of yourself. A shortcode that can be
useful here is `image`, which adds an image with an optional frame. You can set
the width with the `width` option. Example usage:
```go
{{< image frame="true" width="11em" src="/img/profile-picture.jpg"
alt="Picture of me" >}}
```
`frame="true"` adds a frame around the picture. You can also add a caption. See
further instructions in [How to create a
blog](#user-content-how-to-create-a-blog).
At this point you should also set the title for the web site, your name
and the text in the header, if you want it to be different from your
name. Example entries in `config.yaml`:
```yaml
title: "My New Hugo Site"
params:
author: "John Doe"
siteHeading: "a header title"
```
If you don't want to show the latest posts from your blog at the bottom
of the home page, set `showBlogLatest` to false in your site `config`.
You may also want to change the number of posts shown (default: 3) and
the heading above it (default "Latest from the blog") In config.yaml, it
would look like this:
```yaml
params:
showBlogLatest: true
blogLatestHeading: "Latests posts"
nBlogLatest: 6
```
An alternative way to create the content for the homepage is to have a headless
bundle `content/homepage`. The content of the files in this directory will be
populate the the top of the homepage, like in the Hugo Basic Example.
## How to create a blog
1. Add some posts with e.g. `hugo new blog/post-1.md` etc.
2. `hugo new blog/_index.md` and create the blog menu item in the front
matter:
```yaml
---
menu:
main:
identifier: "blog"
name: "Blog"
weight: <lower number than your other menus for more leftward
placement>
---
```
3. (Optional) Create a drop-down menu with links to tags, categories
and archive by creating pages in the style of `hugo new
tags/_index.md`. It doesn't need any content at all, just create a
front matter where you add it to the main menu with the `identifier`
of your blog menu entry as parent:
```yaml
---
menu:
main:
name: "All Tags"
parent: "blog"
weight: <lower number than your other menus for more upward
placement>
---
```
In the case of archive, you may also need to set the layout to
archives in `_index.md`'s front matter: `layout: archives`.
For those of you who do the third step, there is an option available to
remove the buttons with links to the archive (if you have an archives
page, see step 3), tags and category pages from the top of the blog list
page. Just set the following in your site `config`:
```yaml
params:
showTaxonomyLinks: false
```
Menus in Hugo are a mess to program for a theme but this should work.
It's the method that gives you, the user, the most freedom to choose the
structure of your content folder. There are [other
methods](https://discourse.gohugo.io/t/another-way-to-make-a-menu-item-active/17029)
for theme developers but they would force the user to put all posts in a
folder with a specific name.
If you don't want a drop-down menu for listing categories or tags, just
skip step 3. You can still disable the links to the taxonomy pages. Your
readers can list all posts from a specific category or a tag by clicking
on that category or tag in any post instead, and you can link to
`yourpage.com/categories` from other places too.
You can add images just as for the home page. Available options are those of the
built in `figure` shortcode of Hugo, and additionally:
| Parameter name | Allowed Values |
| :--- | :--- |
| `float` | right/left |
| `frame` | true/false/leave out |
| `wide` | true/false |
| `width` | e.g. 10em, 50%, 70px |
| `height` | e.g. 10em, 50%, 70px |
A difference from the built in shortcode is that width and height are for the
outer `<figure>` element. This allows text to wrap around the picture if you set
the float parameter.
You can also use Hugo's built in short code
[figure](https://gohugo.io/content-management/shortcodes/#figure) (an
example: `{{< figure src="/img/picture.jpg" width="100%" >}}`)
### Adding comments
This theme supports Disqus comments. It goes against the philosophy of
the theme in some sense because it relies on external resources but you
can enable it if you want.
Disqus is implemented the [default Hugo
way](https://gohugo.io/content-management/comments/#add-disqus) so just
add your Disqus Shortname in the site `config` and all blog posts will
have a comments section.
## How to create a gallery
There are four shortcodes for creating a gallery:
* `gallery-category`
* `gallery-photo`
* `gallery-modal`
* `gallery-script`
The first two are used in combination to create the actual gallery. Do
something like the following in one of your pages:
```go
{{< gallery-category >}}
{{< gallery-photo fn="<filename of first picture>" caption="<your caption>">}}
{{< gallery-photo fn="<filename of second picture>" caption="<your caption>">}}
{{< gallery-photo fn="<filename of third picture>" caption="<your caption>">}}
{{< gallery-photo fn="<filename of fourth picture>" caption="<your caption>">}}
{{< /gallery-category >}}
```
The pictures should be under `static/img/thumbnails` in your project.
If you want a modal to pop up with a zoomed in version, add the other
two shortcodes at the bottom of your page:
```go
{{< gallery-modal >}}
{{< gallery-script >}}
```
And place corresponding full-size images under `static/img/fullsize`.
The file names need to be the same as for the thumbnails.
Thumbnails should of course be small so that your page loads fast and
fullsize should be large enough that they don't look pixelated when
covering the full space of a web browser. One way to resize images is
with (graphicsmagick)[http://www.graphicsmagick.org/]: `gm mogrify
-resize 1920x1920 *.jpg`, which will resize all images in the current
folder to a maximum width/height of 1920 pixels (while maintaining the
aspect ratio).
## How to create a resume
There are some shortcodes that can help you create a resume. These are:
* `container`
* `resume-section`
* `resume-category`
* `resume-entry`
`Container` just creates a <div> element with a specific class.
`resume-section` needs a title which will be shown to the left of it's
content (if it can fit on the screen, otherwise it's on top). Within
this, you put one or more `resume-entry` shortcodes. This
shortcode takes the three parameters `what`, `where` and `when` (see
example usage below). It also takes raw HTML within the shortcode tags.
There is styling for `<p>`s, links, and unordered and ordered lists.
Apart from that, site-wide CSS is used. Example usage:
```go
{{< container >}}
{{< resume-section title="About Me" >}}
{{< resume-entry >}}
<p>
Some info about you.
</p>
{{< /resume-entry >}}
{{< /resume-section >}}
{{< resume-section title="Education" >}}
{{< resume-entry what="Bachelor's program of Computer Science"
where="Sidney University"
when="2010–2013">}}
<ol>
<li> Some comment on what skills you learned</li>
<li> Some other comment </li>
</ol>
{{< /resume-entry >}}
{{< /resume-section >}}
{{< /container >}}
```
A tip is that you can also use the `resume-entry` shortcode with
markdown. Just switch use % instead of < and make sure that your
markdown doesn't have any white space in front of it (or all of it will
be interpreted as code):
```go
{{% resume-entry what="Bachelor's program of Computer Science"
where="Sidney University"
when="2010–2013" %}}
* Some comment on what skills you learned
* Some other comment
{{% /resume-entry %}}
```
## How to display social links
There is a shortcode for creating a framed area with links to your
profiles called `contact-box`. The thing it does is to put a frame with
links to your social media or other contact info on the rights side of the page, and, if you
want, some text on the left side of the box, outside the frame. Put this
text within the shortcode tags.
You decide what social media to include in your site `config` under
social under params, like this:
```yaml
params:
social:
github: <your github username>
email: <email address>
```
For all available social icons, see the `data/notrack/social.yaml` file. There
are 64 of them. Then, to display the links somewhere on your page, use either
`{{< contact-box >}}` or, for an alternative design, use `{{< social >}}`.
Here is a screenshot with `contact-box` to the right and `social`
at the bottom:
<img src="https://raw.githubusercontent.com/gevhaz/hugo-theme-notrack/master/images/social-links.png" width="40%" alt="Example of social link shortcodes">
For `contact-box`, there are three optional parameters, `float`, `width`
and `height`. This is similar to the `image` shortcode. `Float` makes
text wrap around the box (can be `right` or `left`), and the other two
naturally set the dimensions of the `<div>`, using inline CSS. The
parameters defaults to floating to the right, the width defaults to
`12em`, and the height defaults to `auto`.
# How to set a footer
If you want to add a footer to your webpage, you can use the `footer`
key in your configuration, e.g:
```yaml
params:
footer: "This work is licensed under a Creative Commons Attribution-ShareAlike 4.0 International License."
```
This will add a HTML <footer> element with a <span> element with your
text in it.
# Other projects used in this theme
The theme does not secretly download any resources from other websites
or CDNs. It does, however, make use of a few other projects. These are
included in the theme files, so you'll homepage will serve the
resources.
Some of the fonts under `static/fonts` are parts of the project [GNU
FreeFont](https://www.gnu.org/software/freefont/). They are licenced
under "GPLv3 or later". Licenses are also supposed to be included in the
.woff files themselves. Some of the fonts are edited by me to take up
less space by including fewer characters.
The monospace font in the same directory, used for code in the theme, is
[Mononoki](https://github.com/madmalik/mononoki). It is licensed under
SIL OFL 1.1
([https://scripts.sil.org/OFL](https://scripts.sil.org/OFL)).
The icons used for the `contact-box` and `social` shortcodes are from
[Font Awesome](https://github.com/FortAwesome/Font-Awesome) project.
It's licence is SIL OFL 1.1
([https://scripts.sil.org/OFL](https://scripts.sil.org/OFL)). A HTML
comment is included in the contact-box shortcode to show the licence and
source.
For matching the icons from Font Awesome with names for various social
networking services, I use the
[`social.yml`](https://github.com/dillonzq/LoveIt/blob/master/assets/data/social.yml)
file from the [LoveIt](https://github.com/dillonzq/LoveIt) theme, which
uses the MIT license. I modified it to use the *Font Awesome Solid* font
for the email icon, because the one in the original file was using the
*Font Awesome Regular* font, which it seems only Pro users of Font
Awesome [can use](https://fontawesome.com/plans). The solid one also
looks better.
All of the images in the example site are in the public domain.
# Contribution
I have tried to test the theme on mobile as well as different screen
sizes. If you find a situation where fonts don't have an appropriate
size or something else looks off, such as styles completely missing or a
page that seems to have the wrong layout, please open an issue. It's
difficult to support every possible scenario, but I will see what I can
do.
If some change could be made or something could be added that is in line
with the style and philosophy of the theme, and it doesn't break anything,
feel free to make a pull request.
|
